Saturday, May 30, 2020

20mm plastic figures and PVA.

One of the potential problems of using the really fine 1/72 polyethylene figures is that of paint flaking off in use because of their flexibility.  Historically probably more of a problem with enamel paints which aren't as flexible as the more modern acrylics. This may be a worse problem if they're based, or not, in a way that encourages touching the figures with your fingers.

I do prime any figures that I paint usually with black although I've experimented with other colours, brown and gray for example. I have read quite a few articles, there's one here on the Baueda site, where people swear by using watered down PVA as a base layer before painting. So I thought It would be an interesting experiment to give it a go on a unit of Revell Winter Germans I was painting up to be based for Crossfire.


I'm trying a couple of different things here. Holding the figures as you paint is a bit of an issue with figures this small and in the past i have used a small stick with 6 figures PVA'd to it. This is a problem if you're trying to get at the side of a figure so my solution stolen from the world of airbrushing is to use small nails with the figures glued to them. A bit of board with drill holes provides a place to dry.


My biggest concern was losing detail but the PVA seems to shrink a bit and was also watered down lightly. Simply applied with an old craft brush. An interesting side effect on the brush was it stripped any old paint sticking to the bristles.


I'll let them dry overnight and will see what they look like in the morning.


Monday, April 20, 2020

6mm viking settlement

WARGAME 1066 SAXONS VIKINGS NORMANS available from Helion

After a frustrating loss of article due to an incorrect button press, I'll have another crack. Luckily the images were stored in the cloud. I was painting some 6mm Dark Ages Heroics & Ros Vikings and Normans when I wondered if I could make a little settlement for them. Having the "1066" book on hand I scanned these pages as a pdf and printed them out. 


The book open to the building page and the test print. Dennis has mentioned somewhere that he under scales the buildings in the books slightly for 28mm. Some rough calculations and a bit of eyeball  comparison between the height of figure and doorways and I had what i was happy with.  


B & W print at 30% with a stand of 6mm archers for reference. There are three small buildings on the page, one with two separate doors.


The cutting begins, i did quickly colour the roofs with a pencil just to see what it looked like. 


Kitchen knife put into service to roll a roof.


I used super glue rather than paper glue or PVA as I wanted a quick bond. The only drawback is it leaves a stain as it draws up into the paper before it sets. A partial solution might be to use a toothpick or bent paperclip to apply the glue sparingly.  


The first building


Each tab and fold gets pre-bent as there's not much room to work once you start gluing. 


Building takes shape.


A bit of bin diving when i realised i'd "cleaned up" the doors for the barn.


An MDF base from a piece of scrap with the building positions laid out. I'm just about to apply my basing mix, part beach sand, bits of plaster, rocks. It just gets added to as I find things to go in. Brush on PVA, sprinkle the topping over then just shake whatever hasn't stuck back into the tub.


Let dry then brush with PVA to seal.


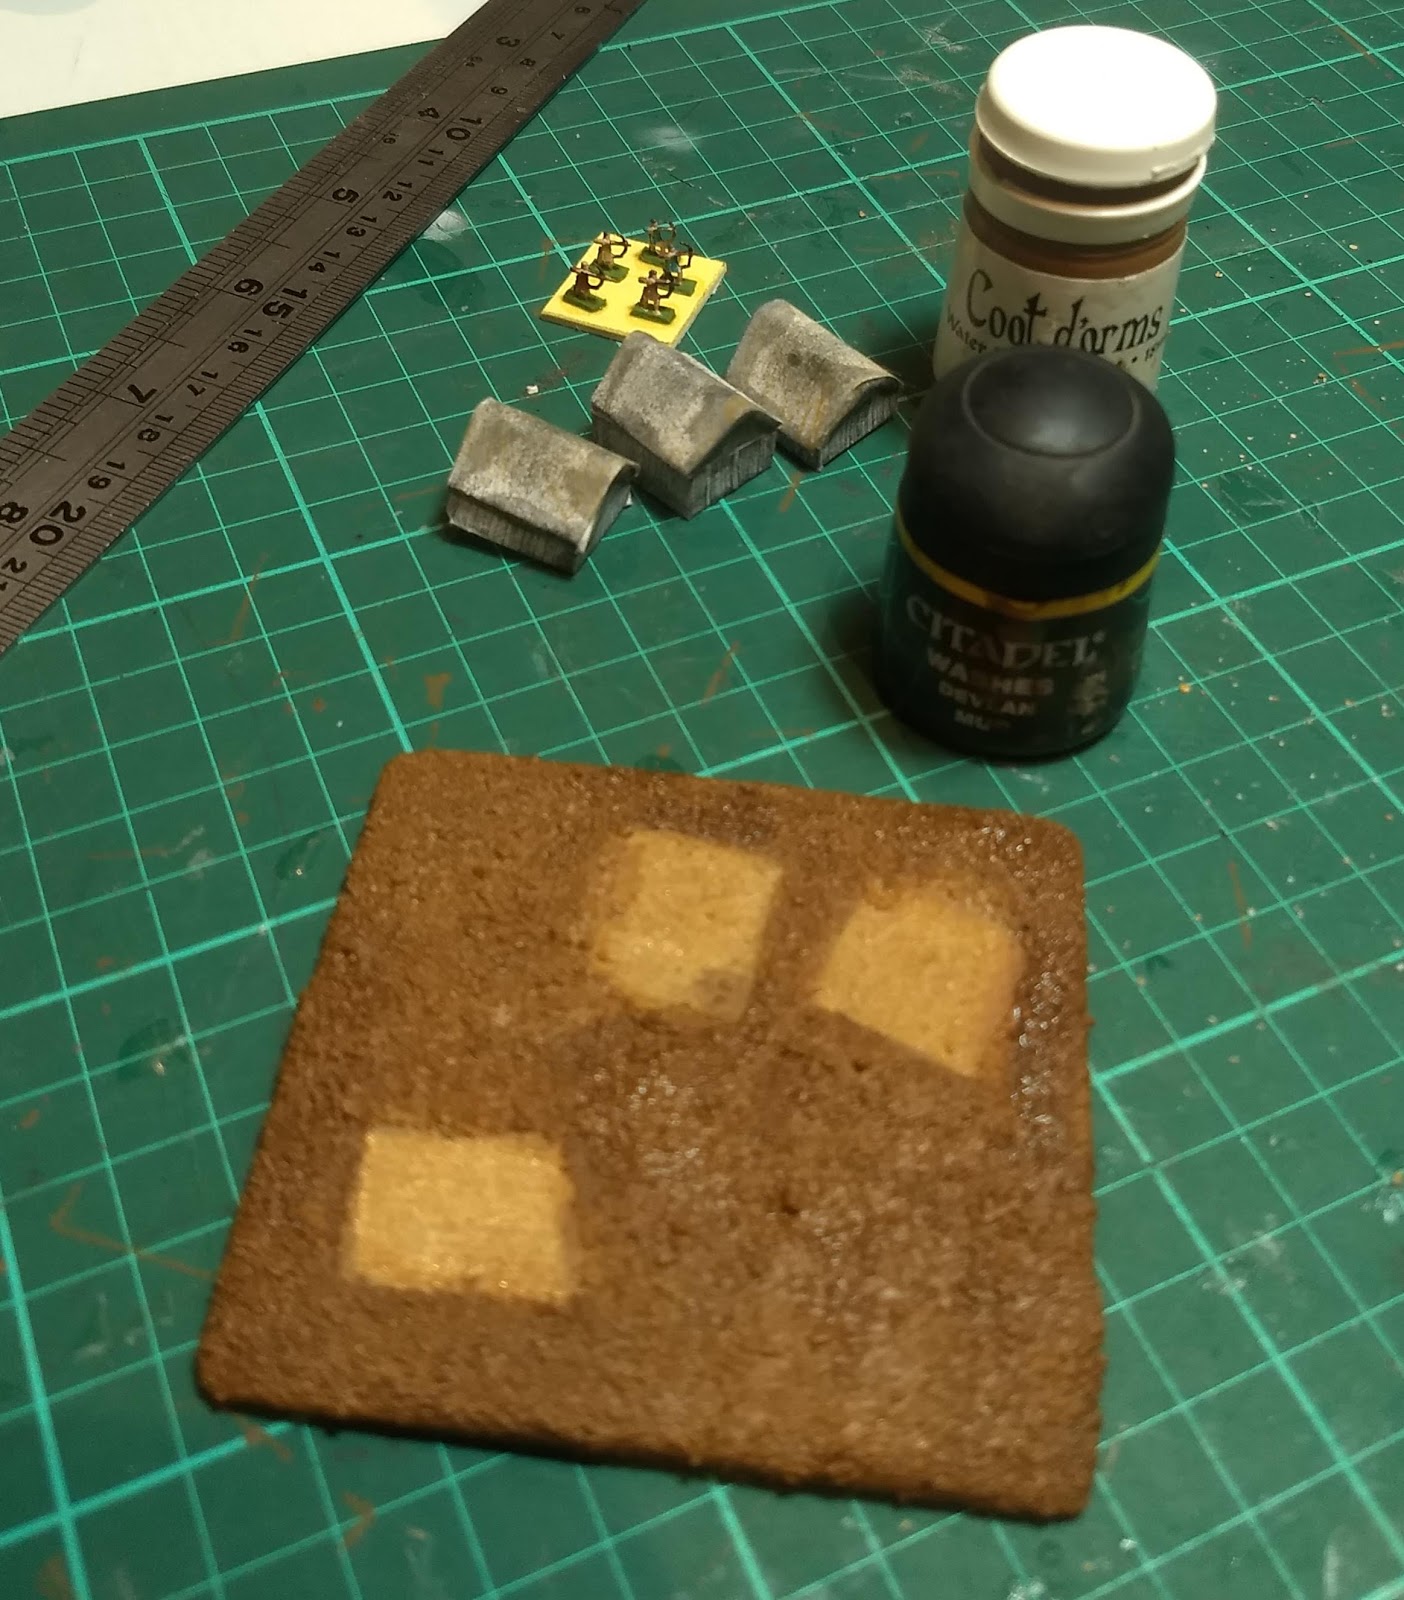
First layer of paint, Coat d'Arms Barbarian Leather


Wash with GW Devlan Mud


Dab on grassy areas with Vallejo Violet Green?


Lighten up the grassed areas with an old GW LOTR pot, probably Goblin Green. 


I'm pretty happy with the result, it's simple and looks ok at this scale. I'll do it again at some stage when I get access to a colour laser printer. It could be used  as a little settlement on a table or an objective. I may add some trees /animals/ fencing/ troughs/ barrels if i ever get back to it as it looks a bit stark as it is.

Thursday, September 21, 2017

Games Workshop 40k Penitent Engine


Inquisition icon ( the winged I) is a transfer, all the scrollwork is hand painted, from two feet away on a gaming looks very effective


The weak foot joint is pinned though base to leg, all the weight of the model goes onto these two points.

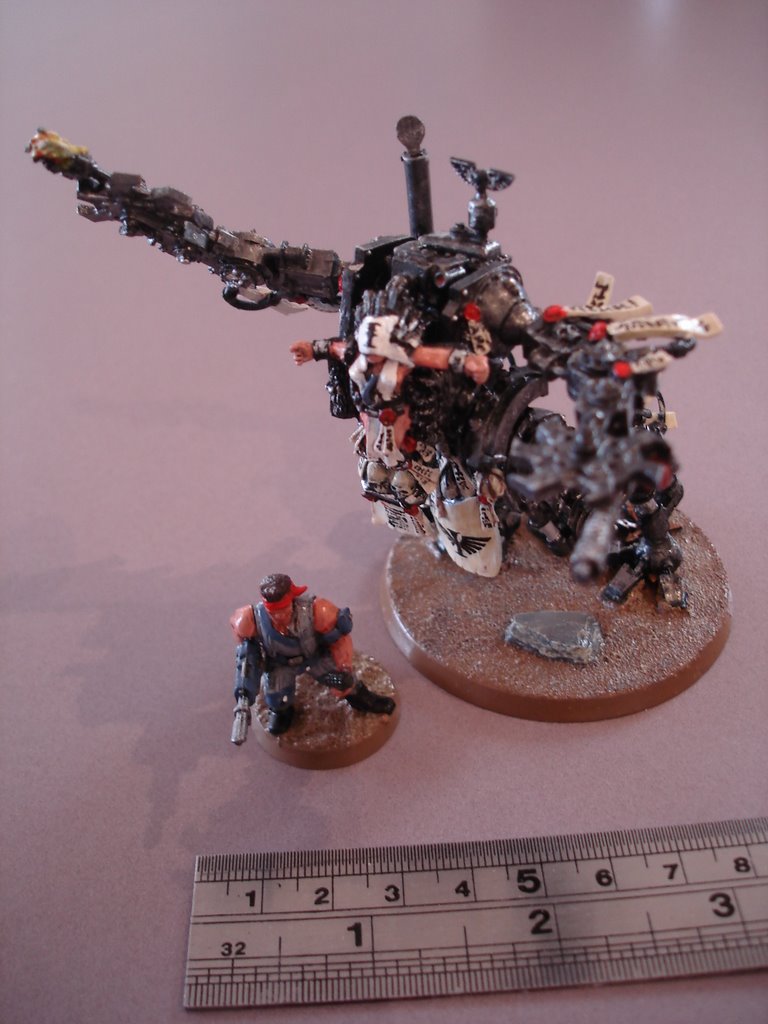
Deceptively large because of the outstretched arms, Catachan in urban camo for size. 


I tried to get some movement in the model as though it was swinging around towards something.
I painted this Games Workshop Penitent Engine for a friend and took these photos way back in 2008. It's a full metal model and a pain to get to sit together. The weight just dragged the glued joints apart and it required a fair bit of drilling and pinning to sit together.